Search
Popular Posts
How to add default blogger contact form to a page.
Sajeev KR
11:52 PM
Most of the bloggers are using third party contact forms like 123contactform to use in their blog. In my aspect, the blogger default contact form is the best option available to integrate into your blog.
Default Blogger Contact Form
There are several advantages of using the blogger contact form, one is the validations to the inputs. This contact form has validation to check the user has entered the email address and message. This is an add on feature to prevent spam by restricting the user to input the proper email address and message to send. Once the message is successfully sent the user will be notified with the success message. Another advantage is it's lightweight and easy to use.
Below are the validations displayed in the blogger contact form -
If you want to demo the default blogger contact form click on our contact us page. We are using the same blogger contact form but spiced up with some user interface customization to look better. If you like our contact us page comment below, I will be sharing the contact form design with you.
Below are the steps involved to integrate the contact form in your blog. If you are experiencing any trouble in the below steps feel free to contact me in the comment section.
Adding Default Contact Form in Blogger
- Go to www.blogger.com. Log in with your credentials and choose the blog you want to create a contact form.
- Click on the Layout option in the left menu in blogger.
- In the below image, you can see a sidebar-right-1 title. Click on the Add a Gadget option below the sidebar-right-1.
- Then this will be redirected to the page with a list of gadgets. From the list, choose the contact form widget and click save.
Copy the below code and make some CSS change in the blogger template
- Click on the Theme option.
- Click on the arrow near the customize option.
- Select the Edit Html option from the pop-up menu.
- Search for <head>, remove the double quotes from the below line and copy under the head tag, and save it.
- After this code change, the contact form added in the sidebar will be hidden.
Create a page to display the Contact Form
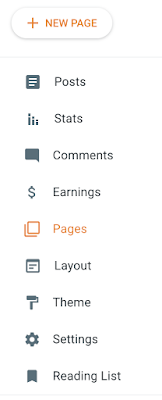
- Click the New Page option.
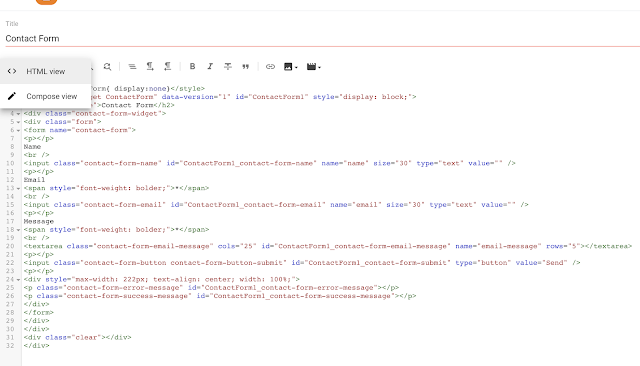
- Copy the below contact form code.<div class="widget ContactForm" data-version="1" id="ContactForm1" style="display: block;"><h2 class="title">Contact Form</h2><div class="contact-form-widget"><div class="form"><form name="contact-form"><p></p>Name<br/><input class="contact-form-name" id="ContactForm1_contact-form-name" name="name" size="30" type="text"value=""/><p></p>Email<span style="font-weight: bolder;">*</span><br/><input class="contact-form-email" id="ContactForm1_contact-form-email" name="email" size="30"type="text" value=""/><p></p>Message<span style="font-weight: bolder;">*</span><br/><textarea class="contact-form-email-message" cols="25" id="ContactForm1_contact-form-email-message"name="email-message" rows="5"></textarea><p></p><input class="contact-form-button contact-form-button-submit" id="ContactForm1_contact-form-submit"type="button" value="Send"/><p></p><div style="max-width: 222px; text-align: center; width: 100%;"><p class="contact-form-error-message" id="ContactForm1_contact-form-error-message"></p><p class="contact-form-success-message" id="ContactForm1_contact-form-success-message"></p></div></form></div></div><div class="clear"></div></div>
- Add the title of the page > select Html View > paste the above code > save it.

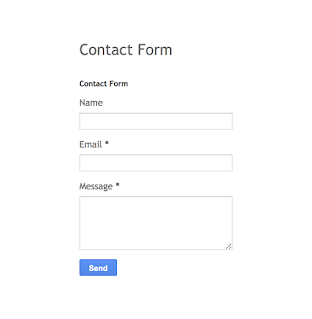
- After saving the page, you will be able to see the contact form on the page.
- After submitting the contact form the mail will be triggered to the blog admins. Find the attached sample mail below.
Hope everyone is able to create a contact form in blogger. If you are experiencing any troubles in the above steps please mention in the comment section, I could help you out. We are planning to create some customize user interface changes[beautify] to the current created contact form. Visit us again.
You may like these posts
Search This Blog
Contact Us
Footer Menu Widget
Created By Blogspot Theme | Distributed By Gooyaabi Templates


0 Comments